If you follow the steps below you can easily receive data from a uPart and see the sent data in the Particle Analyser. Please note, that this guide is written for Windows (for device drivers and software for linux see http://particles.teco.edu/software/index.html)!
| uPart | |
|---|---|
| cpart | |
| USB bridge | |
Install the Java Development Kit as described on the Sun page.
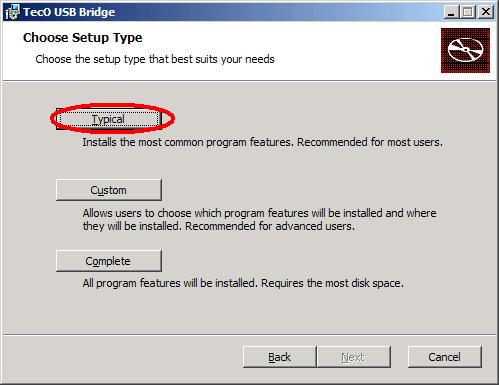
Start usbbridge_v100.msi from your computer and choose 'Typical '
If finished, you should find a link to the program on your desktop.
Extract the usbbridge_v200_driver_libusb.zip into a directory of your choice.
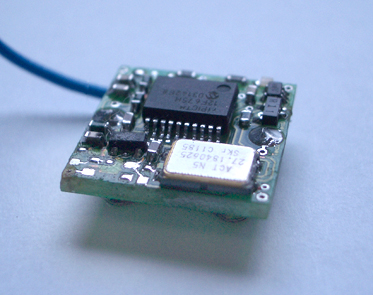
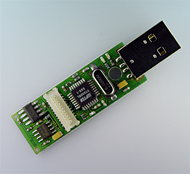
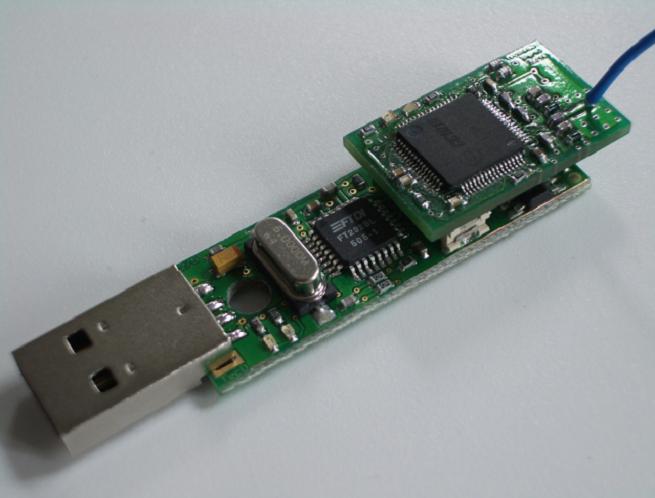
Now insert the USBBridge in your
USB port. Please note that the receiver (cPart) should be
connected on the USB board on top like in the image shown below.
Windows will now request you to select the driver.
Specify the Driver directory you chose earlier. The
installation concludes automatically the correct .inf file.
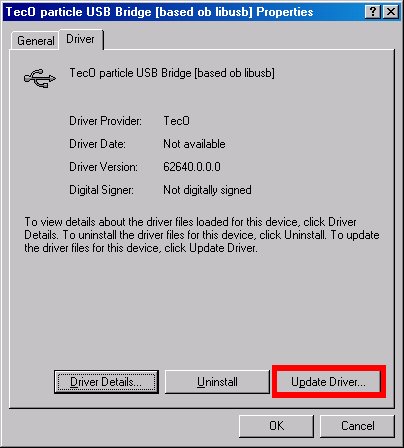
Check for the "TecO particle USBBridge [based on libusb]" in the Device Manager. It
should read like the following:
![]()
If you have already installed an older version of the USBBridge driver, pleas update it:
Depending on the version you downloaded the installation is slightly diffenent.
Extract particleAnalyzer-20040114.zip to a directory of your choice. You will find the executable in the following directory: 2004_01_14\ParticleAnalyzer\Analyzer.exe.
Extract pAnalyzer-0.0.5.zip to a directory of your choice. In that directory you will find a run.bat to execute it.
Click on Webstart and follow the instructions on screen. You need to accept the certificate in order to use it. After the installation all the files are stored in a temporary folder for offline usage.
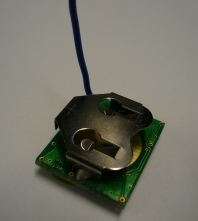
To start a uPart simply insert a 3 volt lithium manganese battery in the battery slot of the uPart.
Switch it to "uPart" and press the "Start" button. |
Start a uPart (if not done yet) by inserting a batterie and check for incomming data. |
 |
 |
Execute Analyzer.exe in the program directory
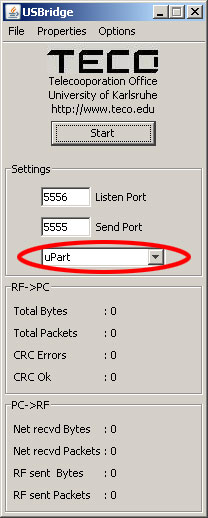
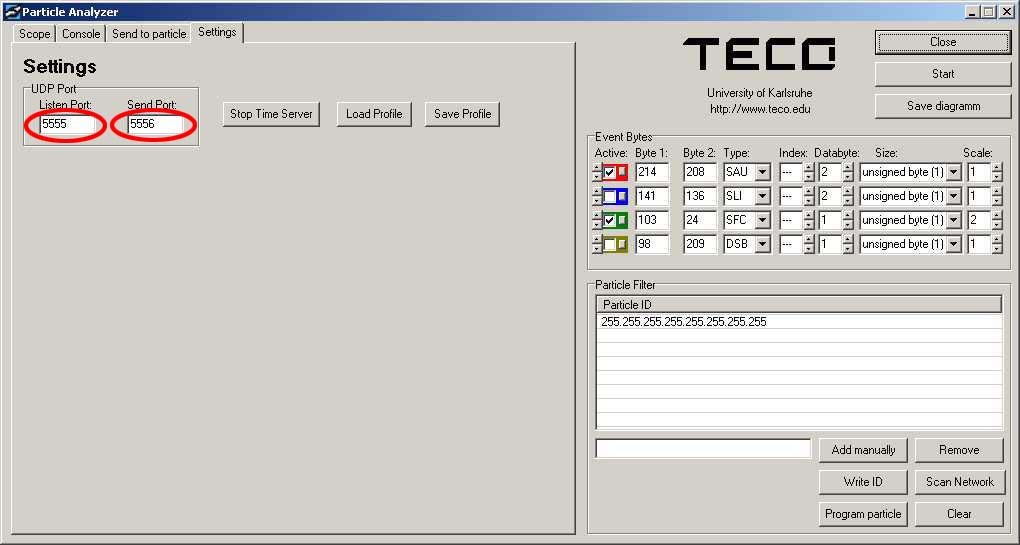
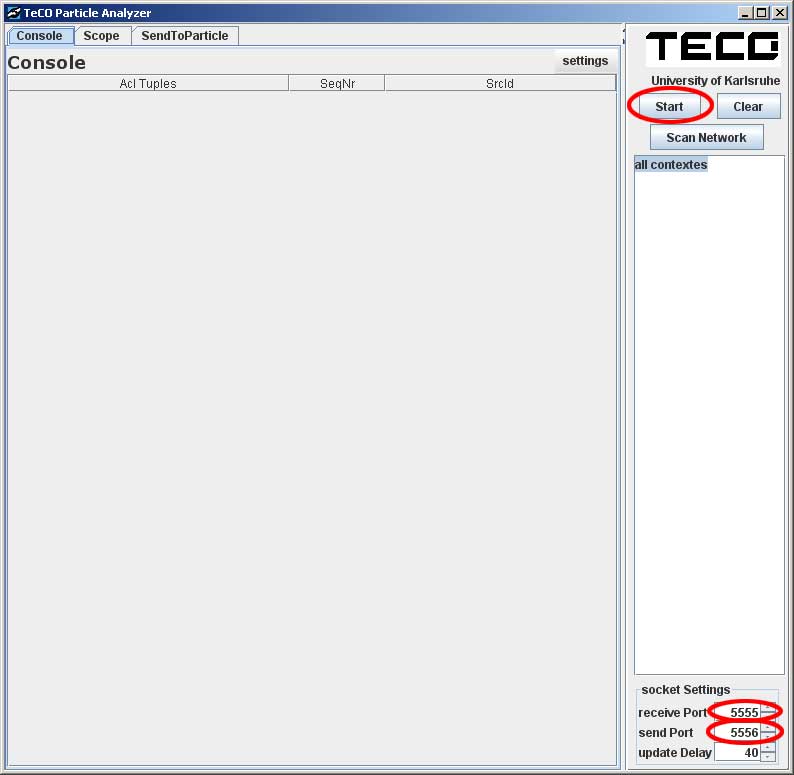
Switch to the tab Settings and check if the ports are correctly entered as shown below. Note: The USB bridge software listens on port 5556 and sends any received RF packets to the local network on port 5555 where the particle analyser grabs them. So the listen and send port must be in reverse order.
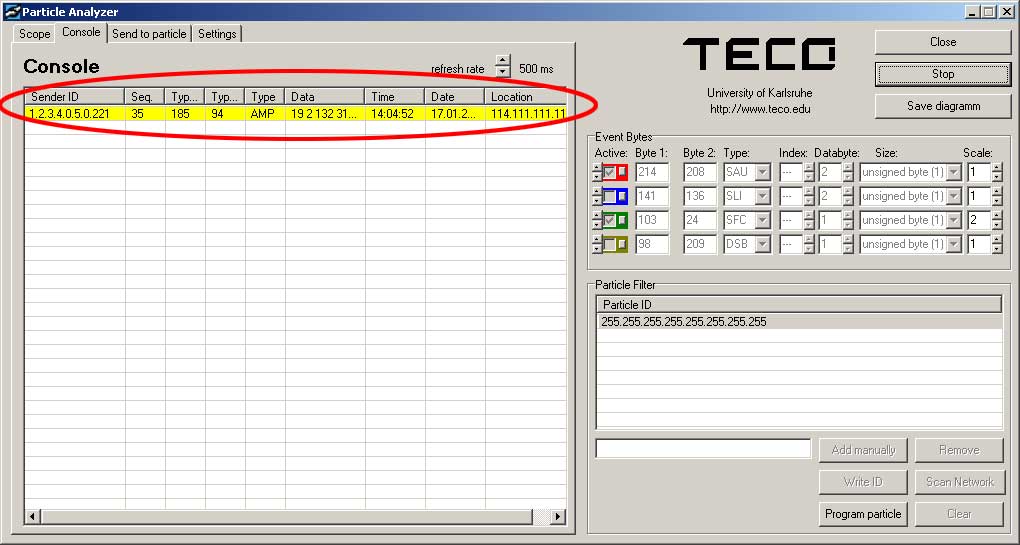
Now press the Start button and switch to the console view where the incoming packets are shown.
Execute the run.bat in the install folder or the ParticleAnalyzer link which should be on the desktop (otherwise you have use the Webstart link). The first start might take some time because the Java virtual machine has to be loaded (as you may know from other applications).
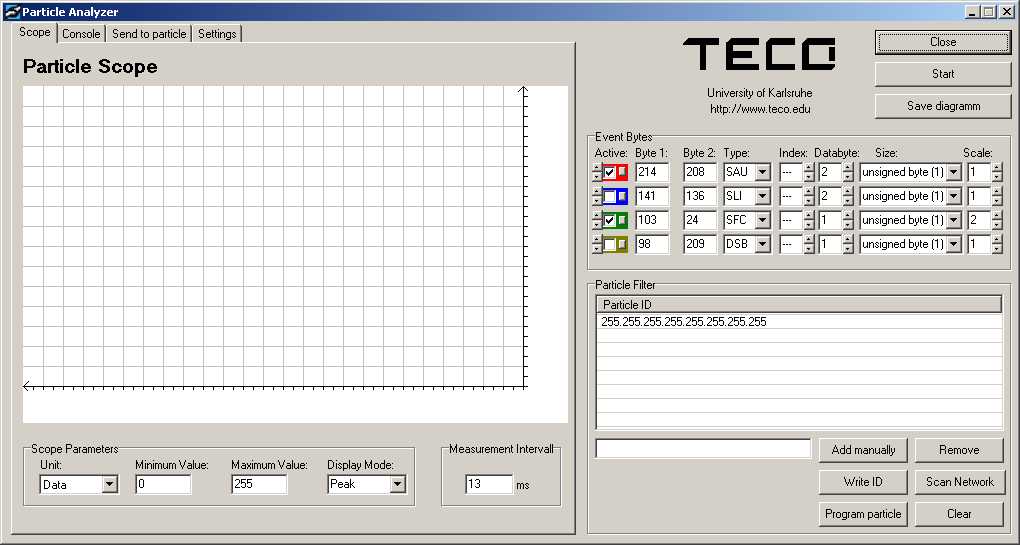
Please check if the ports are set correctly and press Start.
After a packet has been received it will be shown in the list and the ID of the sender uPart is on the right side. If you click on the ID you can filter and show only the selected uPart. In this example I activated 2 uParts.
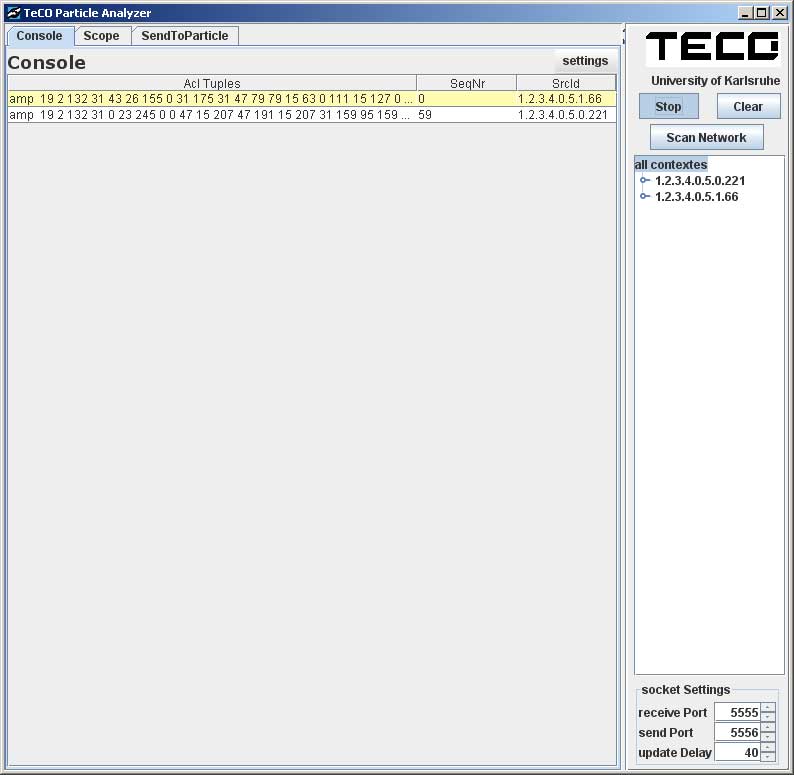
Note: Every USB bridge is broadcasting any data received via RF to the local network. If you have 2 bridges running you might receive duplicates!
For more information about ACL tuples or how to use the libparticle framework to write client applications see the documentationat the particle website.